Share

Can I Paint or Stain Your Fence or Screens Made of Wood?

In a word? Yes, you can paint, stain, or re-seal our wood units. Our wood products come with a basic water-based sealant already applied. We recommend you reseal the unit every 6 months or so when the weather changes to keep the wood looking beautiful.

But if you would like to seal, stain, or paint the unit upon purchasing it, should you sand off the sealant that is already there?

Simply put, no you do not have to. You can paint, seal, or stain over the basic sealant and it will adhere to your unit. However, we have found that sanding the unit before re-sealing or staining the board will bring out the grain and have a better overall look.

When sanding the unit, we used a medium grit sanding block and only sanded by hand until the sheen of the sealant was gone. A power sander was not necessary. To seal the unit, we used Thompson’s WaterSeal Signature Series Clear Exterior Wood Stain in our tests to great effect. For the paint tests, we used Fusion by Krylon.

Check out our video on staining below!

Share

Customizing Enclo Wood Products

Some customers need longer panels for their projects. Unfortunately, we do not offer longer boards for customization. However, many people have been able to purchase their own lumber and using the dimensions and instructions below, made their own longer versions of our products.

EC18008 Richmond/EC18009 Charleston

These two units have the same board measurements so the following instructions can work with either one of the kits!

The boards included for these two units measure 5/8″ thick x 2 3/4″ tall x 38″ long. You should use whatever length of board needed for your particular project. However, in order for the boards to fit into the posts, a channel needs to be cut into each end of your board. Make this channel 0.67” from the end of the board. The channel itself is 0.16” wide and it is very shallow at a depth of only .08”. The channel can be cut slightly deeper, but we recommend you don’t cut past the halfway point of the board thickness. See the below image for further details.

When cutting these channels, we recommend using a table saw so you can set the height of the blade to ensure your channels do not vary in depth.

EC18022 Concord

The boards for the Concord measure 5/8″ thick x 4 1/2″ tall x 38 ¼” long. Again, your length needed will be subject to your project requirements. Due to how the posts are joined in the Concord, we recommend keeping the board height at least 4 1/2″. You can use taller boards, but we advise that you do not use boards any thinner than the boards supplied. Similar to the Charleston and Richmond above, your boards will need to have a channel cut into them to fit properly into the posts. The channel is 0.815″ from the end of the board. It is 0.17″ wide and has a depth of 0.12″. You can make the channel deeper, but again, we advise that you don’t cut the channel deeper than half the thickness of the board.

If additional spacers are needed, they measure 7/8″ x 1 1/8″ x 5/8″ and they can be cut from wood, metal, or PVC.

Get Your Instant Fence Quote with Our Easy-to-Use Online Tool

When it comes to enhancing your yard’s privacy, security, and aesthetic appeal, choosing the right fencing is essential. But the process of estimating material costs and getting a quote can often be both time-consuming and confusing. That’s why we’ve created an innovative online tool to make it easier than ever to get an instant fence quote.

Our fence calculator – Quick Quote – is designed to help you quickly and accurately estimate your fencing needs from the comfort of your home. Whether you’re looking for vinyl or aluminum fence, our tool is here to streamline the process and give you a preliminary quote with no obligation to buy.

Simplify Your Project

One of the biggest advantages of our online fencing calculator is its ease of use. You don’t need to be tech-savvy to navigate the tool – it’s designed to be user-friendly and intuitive. You can use the tool to explore different fencing options, calculate costs, and make an informed decision without any pressure.

We’ve found our customers love the ease and convenience of being able to get an instant fence quote at their own convenience.

How It Works

Using our fencing estimator tool is simple and straightforward. Here’s a step-by-step overview of how it works:

  1. Satellite Map Feature: Start by entering your address into the tool. It will pull up an overhead satellite view of your property, providing a clear and accurate representation of your yard.
  2. Drawing Your Fence: Using the drawing tool, outline where you want your fence to go. You can also indicate the locations of any gates you may want. This visual aid makes it easy to plan your fencing layout.
  3. Selecting Materials and Styles: Next, choose the material and style of fence you prefer. Whether you’re interested in durable vinyl, or maintenance-free aluminum, our tool offers a variety of options to suit your needs.
  4. Getting Your Quote: Once you’ve drawn your fence and selected your materials, the tool will generate a detailed parts list and provide you with an instant fencing quote. This includes a breakdown of the fencing cost, helping you understand exactly what you’ll need and how much it will cost.

Why Use Our Quick Quote Tool?

Our fence estimator offers several advantages over traditional methods of getting a fence quote. It provides accurate and reliable fence cost estimates quickly and conveniently. Regardless of the size of your fence project, our tool gives you a comprehensive quote that you can trust. Plus, the material list for every large order we ship is reviewed buy a friendly project consultant before leaving our warehouse, so you can be assured if there is anything missing from your order such as post caps or a pounder, we will contact you just to make sure you don’t need it.

Traditional methods of getting a fence quote often involve multiple consultations and lengthy waiting periods for quotes. And in-home visits from a sales rep? Ugh … who wants that?!?!

Yikes. No thanks.

With our Quick Quote, you get a hassle-free quote in minutes, allowing you to move forward with your project without delay.

Start Planning Your Perfect Fence Today

Ready to take the guesswork out of your fence project? Try our easy-to-use online fence calculator today and get your instant fence quote with no obligation to buy. It’s a convenient, accurate, and hassle-free way to plan your fencing needs. For personalized assistance, our project consultants are always here to help. Visit our website to get familiar with our full line of no-dig vinyl and aluminum fencing, then see how our Quick Quote tool can help get you started on a fence project with WamBam Fence today.

Share

A Buying Guide for Privacy Fence

For many homeowners, having a private and secure outdoor space is more important than ever. Whether you’re enjoying a quiet evening in your yard or keeping your pets safe, a privacy fence can offer the seclusion and peace of mind you need. But with so many options available, the challenge becomes choosing the right one for your home. In this guide, we’ll explore the benefits of privacy fence, the different types available, and the key factors to consider when making your purchase. Let’s dive in and find the perfect privacy fence for your yard!

Steady Freddy Privacy Fence

Why You Might Need a Privacy Fence

A privacy fence offers numerous benefits, making it a valuable addition to any yard. Here are some key reasons to consider installing a privacy fence:

  • Security: Privacy fences provides a barrier that can deter intruders and keep your yard secure. They also help keep pets and children safely within the confines of your property.
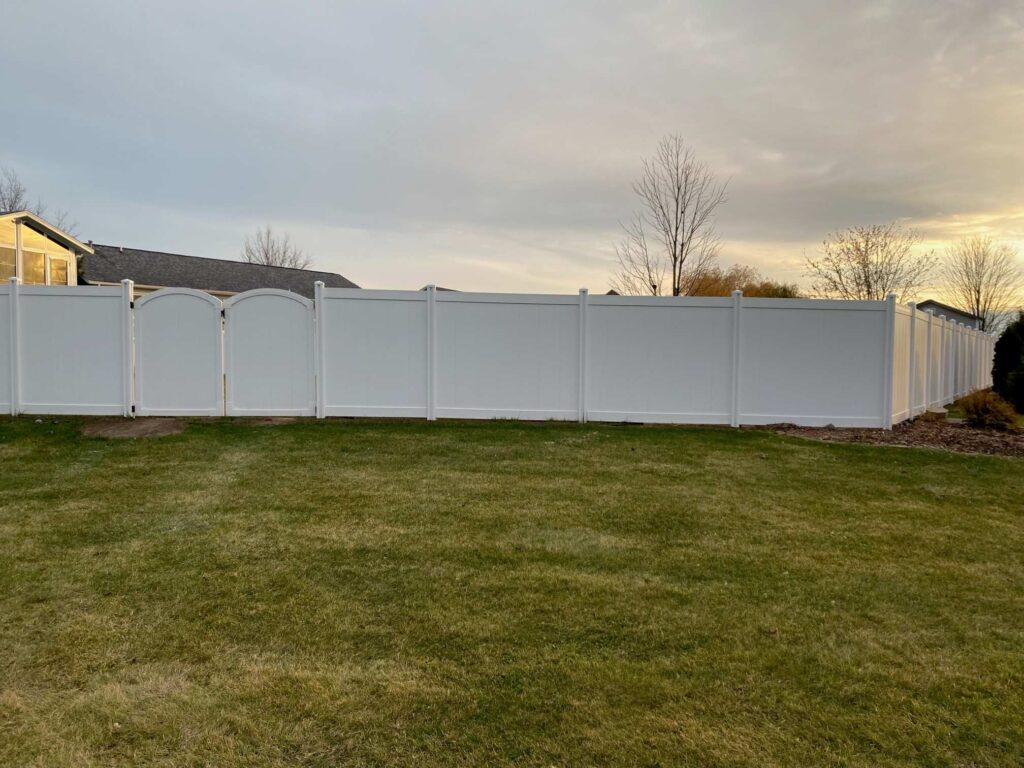
  • Privacy: A privacy fence ensures that you can enjoy your outdoor space without prying eyes. This is particularly important for activities like sunbathing, hosting gatherings, or simply relaxing in your yard.
  • Aesthetic Appeal: A well-chosen privacy fence can enhance the look of your yard. With various styles available, you can find a fence that complements your home’s exterior and landscaping.
  • Noise Reduction: Privacy fences can help reduce noise from nearby roads, neighbors, or other sources, creating a more peaceful and enjoyable outdoor environment.

Common scenarios where privacy fences are useful include homes near busy streets, properties with close neighbors, and yards with swimming pools or other features that require added security and privacy.

Types of Privacy Fences

When it comes to choosing a privacy fence, vinyl fence stands out as an excellent option for many homeowners. Here’s why vinyl fence might be the perfect choice for your yard:

Overview of Vinyl Fence

Vinyl fence is made from polyvinyl chloride (PVC), a type of durable plastic. It’s designed to mimic the appearance of traditional wood fence while offering superior longevity and minimal maintenance requirements.

Benefits of Vinyl Fence

  • Durability: Vinyl fences are highly resistant to the elements, including rain, wind, and UV rays. They won’t warp, rot, or splinter, making them a long-lasting option.
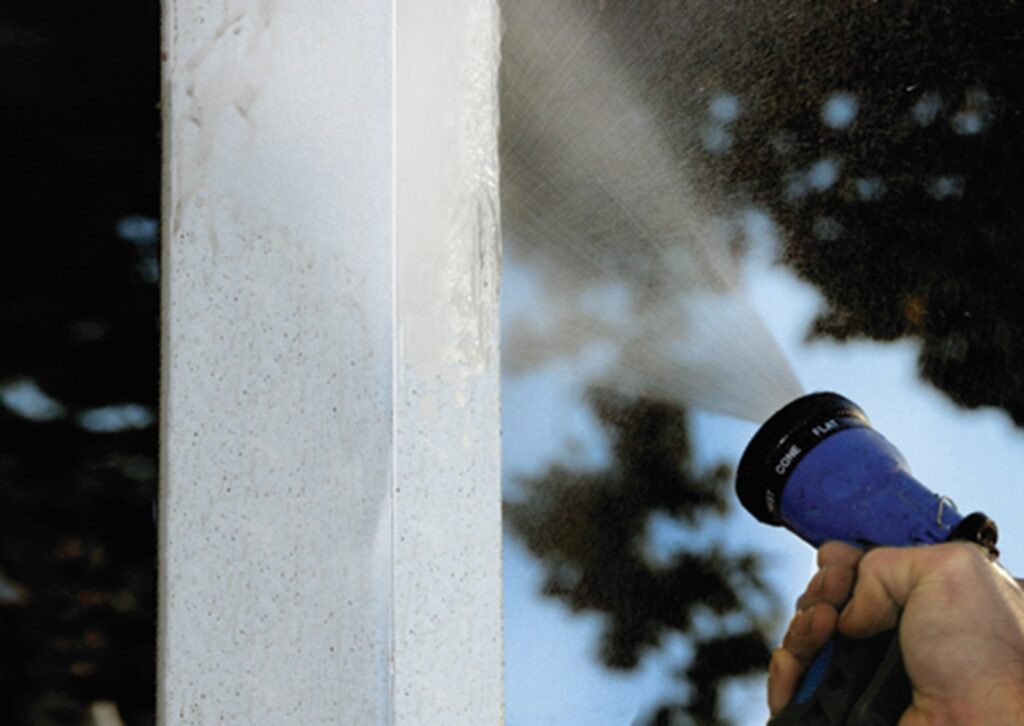
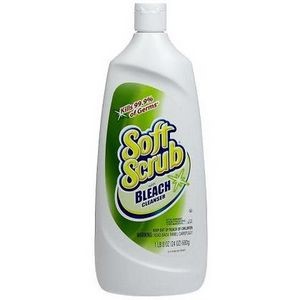
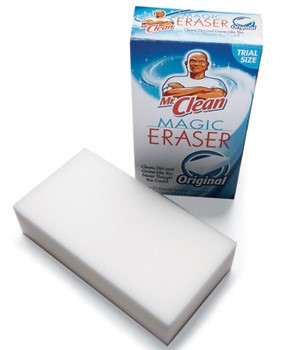
  • Low Maintenance: Unlike wood fences, vinyl fences don’t require painting, staining, or sealing. A simple wash with soap and water is usually enough to keep them looking new.
  • Aesthetic Variety: Vinyl fences come in a variety of styles, allowing you to choose one that best complements your home and landscape. Whether you prefer a classic white picket fence or a more contemporary design, vinyl has you covered.
  • Strength and Flexibility: Vinyl fences are strong and flexible, able to withstand impacts better than many other materials. This makes them a great choice for areas with harsh weather conditions.

Comparison with Other Materials

  • Wood: While wood fences offer a traditional look, they require regular maintenance to prevent rot and insect damage. Vinyl fence, on the other hand, provides a similar aesthetic without the upkeep.
  • Composite: Composite fences combine wood fibers with plastic, offering durability and a wood-like appearance. However, they can be more expensive than vinyl and may still require some maintenance.

With its combination of durability, low maintenance, and aesthetic appeal, vinyl fence is an excellent choice for homeowners looking to enhance their yard’s privacy and security.

Factors to Consider When Choosing a Privacy Fence

When selecting a privacy fence, it’s important to choose the best option for your needs. Here are some key aspects to keep in mind:

  • Initial Cost: Vinyl fence can have a higher upfront cost compared to some materials like wood. However, its longevity and low maintenance can make it more cost-effective in the long run.
  • Long-Term Savings: Consider the savings on maintenance, repairs, and replacements. Vinyl fence typically requires less ongoing investment than other types.

Maintenance Requirements

  • Time and Effort: Vinyl fences are virtually maintenance-free. Unlike wood, which needs regular painting or staining, vinyl only requires occasional cleaning.
  • Cost of Maintenance: The low maintenance nature of vinyl translates to minimal costs over its lifespan. No need to buy paint, stain, or insect treatments.

Durability and Lifespan

  • Weather Resistance: Vinyl fences are highly resistant to weather conditions, including UV rays, rain, and wind. They don’t warp, rot, or splinter, ensuring they last for many years.
  • Longevity: A well-maintained vinyl fence can last 20-30 years or more, providing a long-term solution for your privacy needs.

Aesthetic Preferences

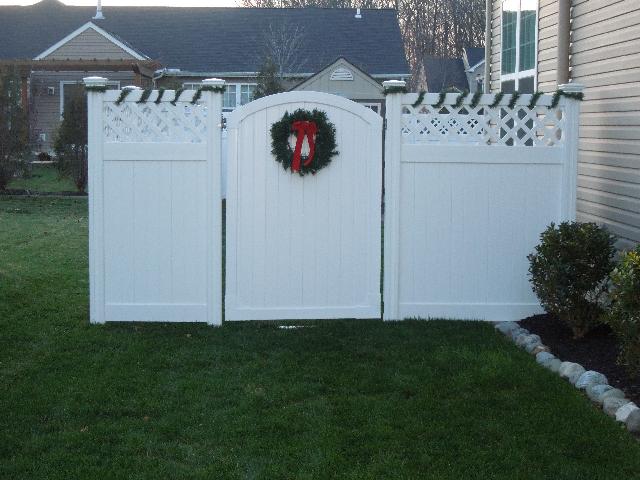
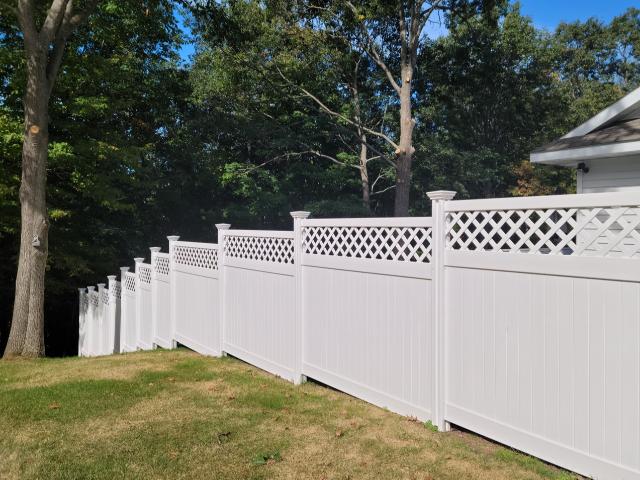
  • Styles: Vinyl fence comes in a wide range of styles. Whether you prefer the look of a classic white fence or a modern design, there are options to suit your taste.
  • Customization: Vinyl fencing can be customized with decorative elements such as lattice tops and various fence post caps to enhance your yard’s appearance.

Local Regulations and HOA Rules

  • Zoning Laws: Check local zoning laws and regulations regarding fence height, placement, and materials. Some areas have specific requirements that must be followed.
  • HOA Guidelines: If you live in a community with a homeowner’s association (HOA), review their guidelines on fencing. They may have rules about the type, color, and height of fences you can install.

By carefully considering these factors, you can choose a privacy fence that not only meets your practical needs but also complements your home’s aesthetic and complies with local regulations.

Installation Tips

Choosing the right privacy fence is only half the battle; proper installation is crucial to ensure it performs well and looks great. Here are some tips to help you decide whether to install your vinyl fence yourself or hire a professional, along with basic steps for installation and common pitfalls to avoid.

DIY vs. Hiring a Professional

  • DIY Installation: If you enjoy home improvement projects and have the necessary tools, installing a vinyl fence yourself can be a rewarding and cost-saving option. Vinyl fence kits often come with detailed instructions to guide you through the process.
  • Hiring a Professional: For those who prefer to avoid the physical labor or want to ensure a flawless installation, hiring a professional is a great choice. Professionals have the experience and tools to install your fence quickly and correctly, ensuring it will last for years.

Basic Steps for Installing a Vinyl Fence

  1. Planning and Measuring:
    • Determine your property lines and check for any underground utilities.
    • Measure the area where you plan to install the fence to calculate the number of panels and posts you’ll need.
  2. Preparing the Site:
    • Clear the area of any debris, rocks, or vegetation.
    • Mark the locations of the fence posts with stakes and string to ensure a straight line.
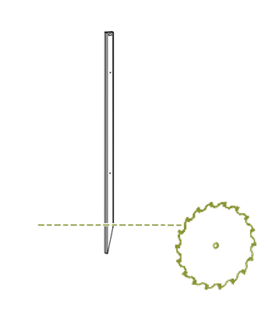
  3. Setting the Posts:
  4. Installing the Panels:
    • Once the posts are securely installed, attach the fence panels to the posts.
    • Follow the specific instructions provided with your vinyl fence kit, ensuring all connections are secure and level.
  5. Adding Finishing Touches:
    • Install any additional components such as gates, post caps, or decorative elements.
    • Inspect the entire fence to ensure all parts are securely fastened and properly aligned.

Common Pitfalls to Avoid

  • Ignoring Local Regulations: Always check local zoning laws and HOA rules before starting your fence installation. Failing to do so can result in fines or the need to remove the fence.
  • Inadequate Post Support: Ensure that fence posts are set deep enough and in properly cured concrete to prevent leaning or instability.
  • Improper Measurements: Double-check all measurements before purchasing materials and during installation to avoid gaps or misaligned panels.
  • Skipping Maintenance: While vinyl fences are low-maintenance, occasional cleaning and inspection for damage will help keep your fence looking new and functioning well.

By following these tips, you can achieve a successful vinyl fence installation that enhances the privacy and beauty of your yard.

Choosing the right privacy fence for your yard is an important decision that can enhance your home’s security, privacy, and aesthetic appeal. Vinyl fencing, with its durability, low maintenance, and variety of styles, is an excellent choice for many homeowners. By considering your budget, maintenance preferences, and local regulations, you can make an informed decision that meets your specific needs.

Whether you decide to install the fence yourself or hire a professional, following the proper steps and avoiding common pitfalls will ensure a successful installation. A well-chosen and properly installed vinyl privacy fence can provide years of enjoyment and peace of mind.

Ready to transform your yard with a high-quality vinyl privacy fence? Explore our range of vinyl privacy fencing options (plus vinyl picket fences and aluminum fences), or contact us for more information, expert advice and a free quote for your project. Your perfect privacy fence is just a few clicks away!


How to Surface Mount Zippity Fences

Our no-dig semi-permanent fences are designed to be installed into the ground using the included staking system. When trying to install them onto a pad of concrete or wood, then it will just take a little extra customization.

*Note: If you have the All American or Newport Fence and would like help with surface mounting them, check here.

Dealing with the Stakes:

For most of our no dig semi-permanent fences, the stakes are part of the post and will need to be cut off before mounting them to a flat surface.  To cut off the stake, we recommend using a circular or reciprocating saw with a fine-tooth blade.

For the several fences that have the no dig stakes as a separate part, you can skip the step in the guide where they are installed. All our ground stakes are 100% recyclable. Please consider recycling, donating, or repurposing unused ground stakes.

  • Materials to purchase:
    • L Brackets – We recommend purchasing stainless steel or powder coated brackets.
      • Check the specifications of the posts in the first few pages of the Privacy Screen installation guide to see what size L Bracket and nut and bolt will work for your application
    • Nuts, washers, and bolts*
    • Wedge anchors (concrete) *
      • The size of your hardware will depend on the brackets purchased. Follow the recommended sizes with the L Brackets

How to Mount:

The L brackets can be installed on the inside of the posts using washers, nuts, and bolts. We recommend using at least 2 L brackets per post.

  • Mark your drill locations
    • Consider the orientation of the posts when joined to the next panel
    • The L brackets can be installed on the inside of the posts using washers, nuts, and bolts. We recommend using at least 2 L brackets per post.
    • Using the L brackets as a guide, mark the posts where the hardware will be installed
  • Drill into the posts
    • Using a power drill, pre-drill the holes on the marked locations on your post for your bolts.
  • Attach the brackets to the posts
    • Position the bracket on the inside of the post for the best functionality and aesthetic appearance.
    • Thread the bolt from the outside of the post, through a washer, the post wall, then the bracket.  If the bolts purchased are too long to do this, drill through the other side of the post and have the bolt going through two sides of the post.
    • Secure a washer and nut onto the bolt to fix the L bracket onto the post.
    • Repeat this process with each L-Bracket
  • Attach the Brackets to the surface
    • Once the L brackets are affixed to the posts, place the screens in the desired position and mark the ground where the L Brackets will be mounted.
    • Follow the directions included with the mounting hardware to mount the brackets to the ground.

Share
Tags

How to Put My Enclo Privacy Screen on Wheels

  • Our screens are designed to be installed into the ground. You will not need the stakes that are provided in the package if you are mounting your screen to casters. All our ground stakes are 100% recyclable. Please consider recycling, donating, or repurposing unused ground stakes.
  • We recommend using caster wheels when mobilizing any of our Privacy Screens. Casters provide a sturdy attachment to the posts.
  • There are two different type of casters that we recommend:
  • L shaped Caster
    • Standard Square Base Caster

How to Install L Shaped Casters

  1. Join the panels with joiner clips
    1. This will help make sure that the nuts and bolts do not collide between posts.
  2. Mark the drill locations
    1. The casters can be installed on the outside of the posts using washers, nuts, and bolts.
    2. Using the caster as a guide, mark the posts where the bolts will be installed.
  3. Drill into the posts
    1. Using a power drill and a bit, pre-drill the holes on the marked locations on the post.
  4. Attach the casters to the posts
    1. Position the caster on the post.
    2. Thread the bolt through the caster and post.
    3. Secure the washer and nut onto the bolt to fix the caster onto the post.
    4. Repeat this process with each caster and post.

How to Install Standard Square Base Casters

Standard square base casters will need to be affixed to the bottom of the posts. The posts are hollow so to attach the casters, a wooden block will need to be inserted inside of the posts beforehand. 

  1. Cut a wood block to fit within the base of the post.
  2. Secure the block.
    1. Drill through the side of the post into the wood block.
  3. Secure the caster.
    1. Set the caster on the bottom of the post, flush with the wood block.
    2. Affix the caster to the block with screws.

How to Surface Mount an Enclo Privacy Screen

Our screens are designed to be installed into the ground but can also be installed onto a surface, such as a deck or patio, if desired. When surface mounting the screen, the steps detailing the installation of the stakes can be skipped. All our ground stakes are 100% recyclable. Please consider recycling, donating, or repurposing unused ground stakes.

Materials to purchase:

  • L Brackets – We recommend purchasing stainless steel or powder coated brackets.
  • Check the specifications of the posts in the first few pages of the Privacy Screen installation guide to see what size L Bracket and nut and bolt will work for your application
  • Nuts, washers, and bolts*
  • Wedge anchors (concrete) *

*The size of your hardware will depend on the brackets purchased. Follow the recommended sizes with the L Brackets

  1. Join your panels with joiner clips
    • This will help make sure that the nuts and bolts do not collide between posts. It will also make attaching the L brackets to the ground easier in later steps.
  2. Mark the drill locations
    • The L brackets can be installed on the inside of the posts using washers, nuts, and bolts. We recommend using at least 2 L brackets per post.
    • Using the L brackets as a guide, mark the posts where the hardware will be installed 
  3. Drill into the posts
    • Using a power drill, pre-drill the holes on the marked locations on the post for the bolts.
  4. Attach the brackets to the posts
    • Position the bracket on the inside of the post for the best functionality and aesthetic appearance.
    • Thread the bolt from the outside of the post, through a washer, the post wall, then the bracket.
      • If the bolts purchased are too long to do this, drill through the other side of the post and have the bolt going through two sides of the post.
    • Secure a washer and nut onto the bolt to fix the L bracket onto the post.
    • Repeat this process with each L-Bracket
  5. Attach the Brackets to the surface
    • Once the L brackets are affixed to the posts, place the screens in the desired position and mark the ground where the L Brackets will be mounted.
    • Follow the directions included with the mounting hardware to mount the brackets to the ground

Can I Paint this Vinyl?

This is a tricky question. While vinyl can be painted, it has the potential to come with many problems. First, it voids the warranty, and the paint may cause the vinyl to warp. Second, it requires a lot of paint to actually change the color. Third, you would be turning a virtually maintenance free product into a product that will need to be maintained. However, if you really, really have a burning desire for an alternate shade, you’ll want to paint it with special epoxy-based paint Fusion by Krylon.

Share
Tags

,

How To Clean Your Vinyl Fence

The beauty of vinyl is that it’s maintenance free. Unlike wood, you will never need to paint or stain your vinyl fence which will save countless hours of time over the years. Having said that, once you invest in a vinyl fence you will want to take care of it to keep it looking fresh for years to come. Everything that is exposed to the weather and elements will start to look dirty and worn after a while if you don’t do some simple maintenance, and a vinyl fence is no exception. Here are 4 tips to help you care for and clean your vinyl fence.

1. A quick rinse with a garden hose

A simple spray of the garden hose is the best way to keep your vinyl fence looking fresh and new.

The easiest and quickest way to care for your fence is to attach a spray nozzle to your garden hose and give your fence a quick bath every month or two. This will rinse off surface dirt and ensure it doesn’t get caked on over the years. If you’ve let it go a little too long and have some especially tough dirt spots after rinsing your fence, keep reading!

2. A gentle bleach-based cleanser with a soft cloth

A gentle cleanser with a soft cloth or soft brush can help with spots and stains the garden hose doesn’t get rid of.

There may be some stubborn dirt spots that cling to your vinyl fence that need a little more elbow grease than a hose. In this case, a soft cloth with a mild bleach-based cleanser directly applied to the spot should easily remove it. Some brands we have used and like are SoftScrub and Mr. Clean. Varsol works well for extremely tough scuff marks, and a soft brush can also help with tougher stains. Just ensure that you do not use a stiff brush as it could scratch your vinyl fence.

3. The Magic Eraser

The Magic Eraser is a safe, easy, effective way to get rid of the tougher dirt stains on your vinyl fence.

The Magic Eraser is a brand name cleaner that is like a sponge, and thus avoids the need for a cleanser and a cloth. Simply dampen the Magic Eraser and work away at your especially dirty spots. It works very well on eliminating the tougher stains and is safe for your fence.

4. Power Washing

A pressure washer can be useful for cleaning a very dirty vinyl fence that has been neglected for some time.

If you have neglected your vinyl for some time and it’s in serious need of a bath, consider a power washer. The pressure from the water will be more effective in removing tough stains and dirt spots than a simple garden hose sprayer.

For Mildew:

In some parts of the country, mildew can be a problem with a fence. It will appear as black spots and usually begins to show up in areas where the rain doesn’t fall, such as under eaves and deck enclosures. For removal, try the following solution:

CAUTION: Greater concentrations may cause damage to the vinyl materials.

Mix together:
1/3 cup detergent (Tide, for example)
2/3 cup Trisodium Phosphate (Soilax, for example)
1 quart 5% Sodium Hypochlorite (Clorox, for example)
3 quarts of water

Wear some gloves and use this solution with a soft cloth or soft brush to remove the mildew spots. Please note that the chemical agents in this solution may be hazardous to the environment and your skin, so take care with both application and disposal.

With some simple maintenance, your vinyl fence will look fresh and new for many, many years to come. If you have any additional questions, please contact one of our fence consultants at 877-778-5733.

Murphy’s Aluminum Fence Laws

Read all about potential obstacles and possible solutions when installing our aluminum fence by reading  Murphy’s Vinyl and Aluminum Fence Laws (wambamfence.com)

Categories