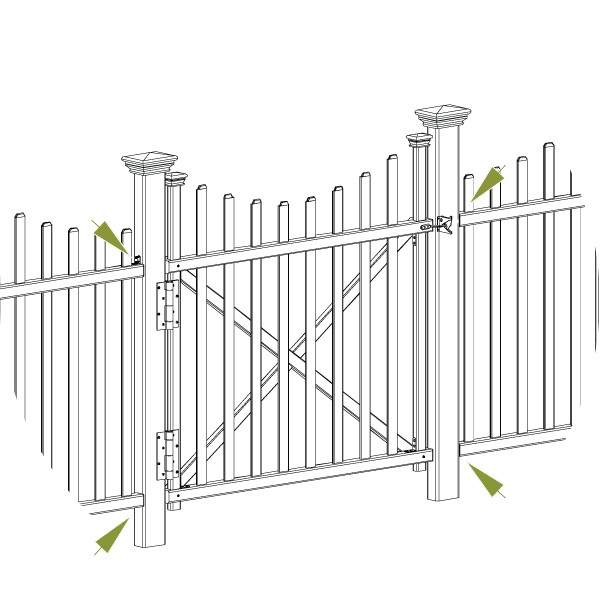
How to Attach a Manchester Panel to a Manchester Gate
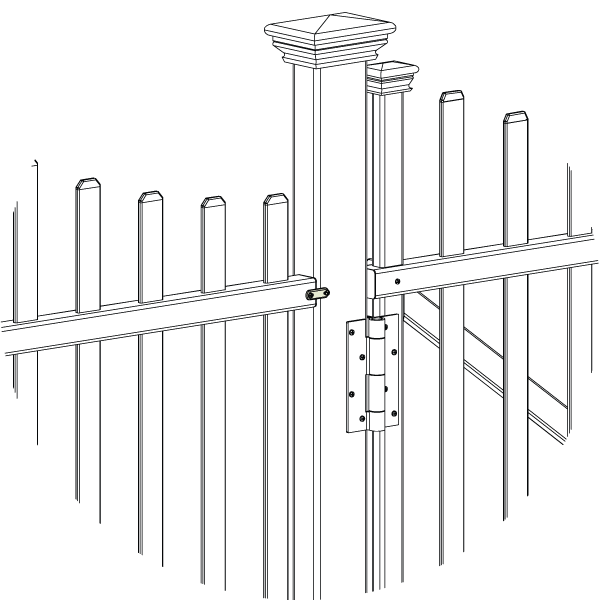
The Manchester gate uses posts that are a different width than the rails on the Manchester panel. These thicker posts are better for supporting the weight of the gate. Because of this difference in design, the rails from the fence panel don’t line up perfectly with the posts from the gate. Use this guide to read moreHow to Attach a Manchester Panel to a Manchester Gate
The Manchester gate uses posts that are a different width than the rails on the Manchester panel. These thicker posts are better for supporting the weight of the gate. Because of this difference in design, the rails from the fence panel don’t line up perfectly with the posts from the gate. Use this guide to see how to go about connecting the two.
When attaching a Manchester panel to the gate there are a few key tips to keep in mind.
- Position and install the gate posts before doing anything else. The gate will perform better and last longer if the hinge post is connected to a panel of fence that is connected to another post. This way, the weight strain will be transferred onto two posts versus just one.
- Installing fence panels on both sides of the gate is ideal in all situations. If this is not possible because of space restrictions, you should make sure your “lone soldier” post is reinforced either by concrete or bracketed to the adjacent structure.
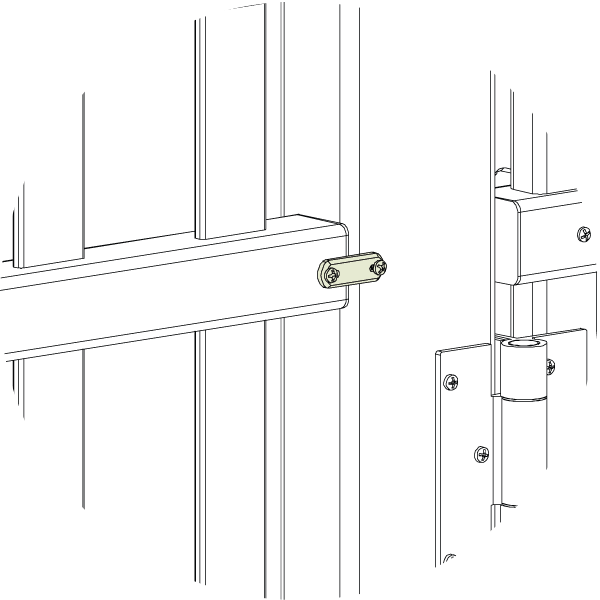
There are two different options of hardware to use to connect a Manchester panel to a gate:
Joiner clips
Use the joiner clips (included with Manchester fence) to attach the gate to the panel posts.
- Align fence panel to “front” or “back” of gate post so the rail is flush with post.
- Using joiner clips, attach post to top rail and bottom rail.
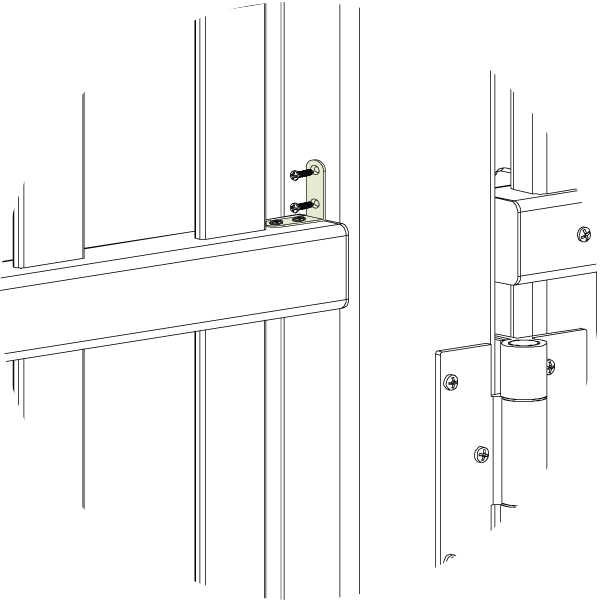
L-Brackets
Using L-brackets is an option that could be more costly, but it does provide a stronger connection than using joiner clips.
- Purchase white L-brackets from a local hardware store or from our parts department. Make sure the width of the L-brackets you purchase do not exceed the 1.5″ width of the panel rails.
- Align rails with the center of the post at your desired height.
- Attach L-brackets to rails and posts as indicated below:
Free Shipping
On Orders Over $3000Let Us Help!
877.778.5733Payment Methods
All Major Cards, Google Pay, Apple Pay & KlarnaFree Shipping
On Orders Over $3000Let Us Help!
877.778.5733Payment Methods
All Major Cards, Google Pay, Apple Pay & Klarna
