One of the benefits to purchasing our vinyl fencing is that it can be cut down to fit your needs. If your run can’t be divided into an exact number of panels, you can cut one down to any width necessary. With varying yard sizes and layouts, this is a common occurrence that has allowed us to learn several tips and tricks for customizing vinyl panels.
Please keep in mind the following before making cuts:
- Measure twice, cut once! Cutting rails too short for your space will require you to purchase replacements from our parts department.
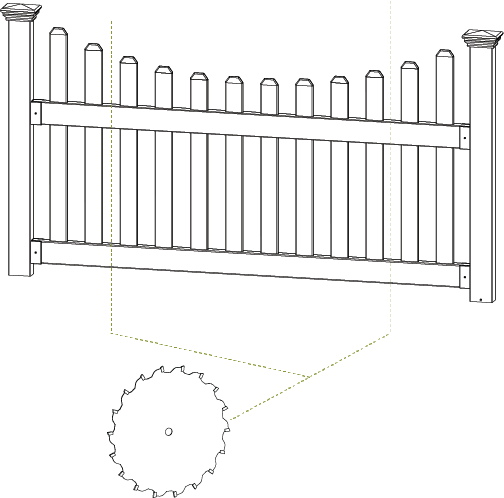
- Use a fine-tooth blade when making cuts. We recommend using a circular saw. You can also use a handheld hack saw for minor modifications. Most cuts are covered by rails or brackets, so don’t sweat the small stuff!
Permanent Fence (All American & Newport)
Additional materials may be needed. These can be purchased from our website:
After all required materials have been purchased, start with Step 1.
- Determine placement of posts.
- Measure distance between posts.
- Mark measurement on rail.
- Aim to trim between picket slots. If marking falls within a picket slot, reduce distance between posts until the cut occurs between picket slots.
- Each end of the rail may need to be cut to avoid cutting through a picket route. This may not be possible to avoid.
- Medium grit sandpaper can be used on end of the rails to remove sharp edges or leftover pieces of vinyl after cutting.
- Refer to instructions regarding mounting brackets and rails.
Semi-Permanent Fence
Most of our Zippity semi-permanent fences were not designed for easy modification. Certain styles such as the Baskenridge fence (and other Zippity fences) have posts at the end of rails, making trimming panels to a more narrow width very difficult. Strongly consider the amount of modification you will need before purchasing or making modifications. If you must…
- Determine length needed for rail
- If the rail has an end cap, try to remove it for re-use, or order extra from our Parts department.
- Mark measurement on rail.
- Aim to trim between picket slots. If marking falls within a picket slot, reduce distance between posts until the cut occurs between picket slots.
- Repeat Steps 1 and 2
- Use a fine-tooth blade circular saw to cut through the rail.
- Medium grit sandpaper can be used on end of the rails to remove sharp edges or leftover pieces of vinyl after cutting.
- If trimming off routed post holes (such as with the Baskenridge), new holes will need to be created using a Dremel routing tool. Use the Dremel routing tool to expand picket slot to fit post through.
- Install End Cap on rail. Use a small amount of vinyl glue, which can be found at most local hardware stores, if needed.
- Continue with assembly per the installation guide.
Free Shipping
On Orders Over $3000Let Us Help!
877.778.5733Payment Methods
All Major Cards, Google Pay, Apple Pay & KlarnaFree Shipping
On Orders Over $3000Let Us Help!
877.778.5733Payment Methods
All Major Cards, Google Pay, Apple Pay & Klarna
